
Chocolate Cake Pop Recipe: Poppable Chocolate Delights
Looking for a chocolatey and fun treat that you can easily pop into your mouth? Look no further! Introducing the Chocolate Cake Pop Recipe: Poppable Chocolate Delights. These bite-sized goodies are perfect for parties, picnics, or just a little indulgence. With a rich and moist chocolate cake center covered in a smooth chocolate coating, they’re sure to satisfy your cravings in one delightful bite.
But wait, there’s more! These cake pops are not only delicious, but they’re also incredibly easy to make. Whether you’re an experienced baker or just starting out, this recipe is perfect for you. So gather your ingredients, put on your apron, and get ready to embark on a chocolaty adventure that will leave your taste buds dancing with joy.
From kids to adults, everyone will be clamoring for more of these irresistible Chocolate Cake Pops. So, let’s dive right in and learn how to create these poppable chocolate delights that will have your friends and family begging for the recipe. Get ready to become a cake pop master and bring the joy of chocolate to every occasion. Let’s get started!
Looking for a delicious treat? Indulge in these homemade chocolate cake pops! These delightful, bite-sized treats are perfect for any occasion. With a rich chocolate cake center covered in a smooth chocolate coating, they are sure to satisfy your sweet tooth. Enjoy them on their own or decorate them with sprinkles or drizzles for an extra touch of sweetness. Get ready to pop your way to chocolate heaven!

Decadent Chocolate Cake Pop Recipe: Indulge in Poppable Chocolate Delights
Welcome to the world of chocolatey goodness! In this article, we will share a delightful recipe for chocolate cake pops that are guaranteed to satisfy your sweet tooth. These bite-sized treats are perfect for parties, special occasions, or simply as a delicious and convenient indulgence. Get ready to learn how to create these irresistible poppable chocolate delights that will have everyone coming back for more!
Why Chocolate Cake Pops Are the Ultimate Treat
There’s something truly magical about chocolate cake pops. Not only are they incredibly adorable and visually appealing, but they also offer a unique and fun way to enjoy the classic combination of moist chocolate cake and rich, velvety chocolate coating. Here are three reasons why chocolate cake pops are the ultimate treat:
- Portability and convenience: Unlike traditional cakes, which require plates and forks, cake pops are easy to grab and eat on the go. They are perfect for events like parties or picnics, where guests can simply pick one up and enjoy!
- Perfect portion control: Cake pops are the ideal bite-sized treat that allows you to indulge in the flavors of a decadent chocolate cake without the guilt. You can enjoy just one or savor multiple pops without feeling overly stuffed.
- Creative customization: One of the most enjoyable aspects of cake pops is the endless possibilities for customization. From colorful sprinkles to themed decorations, you can let your imagination run wild and create unique designs that are sure to impress.
Preparation: Chocolate Cake and Crumbling
Before diving into the delightful creation of chocolate cake pops, it’s essential to have a well-baked chocolate cake to work with. Follow these steps to ensure you have a moist and flavorful cake as the base for your pops:
Step 1: Preheat your oven to 350°F (175°C) and grease a round cake pan.
Step 2: In a large mixing bowl, combine 1 ¾ cups of all-purpose flour, 1 ½ cups of granulated sugar, ¾ cup of cocoa powder, 1 ½ teaspoons of baking powder, 1 ½ teaspoons of baking soda, and a pinch of salt.
Step 3: Add 2 large eggs, 1 cup of milk, ½ cup of vegetable oil, and 2 teaspoons of vanilla extract to the dry ingredients. Mix until well combined.
Step 4: Pour the batter into the greased cake pan and bake for approximately 30-35 minutes, or until a toothpick inserted into the center comes out clean.
Step 5: Allow the cake to cool completely, and then crumble it into a large mixing bowl. Use your hands or a fork to break it down into fine crumbs.
Mixing and Shaping the Cake Pops
Now that your chocolate cake is ready, it’s time to transform those crumbs into delectable cake pops. Follow these steps to mix and shape the cake pops:
Step 1: In a separate mixing bowl, combine the crumbled chocolate cake with ½ cup of frosting of your choice. You can use chocolate frosting for an extra chocolatey kick or experiment with different flavors like cream cheese or salted caramel.
Step 2: Mix the cake crumbs and frosting together until they form a moist and sticky dough. The dough should hold its shape when rolled into a ball.
Step 3: Take small portions of the dough and roll them into 1-2 inch diameter balls. Place the balls on a baking sheet lined with parchment paper.
Step 4: Insert a lollipop stick or cake pop stick into each ball, about halfway through. This will serve as the handle for your cake pops.
Dipping and Decorating the Cake Pops
The final step in creating irresistible chocolate cake pops is to coat them in a rich chocolate shell and add your desired decorations. Follow these steps to achieve a beautifully coated and decorated cake pop:
Step 1: Melt your choice of chocolate coating or candy melts in a microwave-safe bowl, following the instructions on the packaging. Stir until smooth and creamy.
Step 2: Holding onto the stick, dip each cake pop into the melted chocolate, ensuring it is fully coated. Gently tap the stick against the side of the bowl to remove any excess chocolate.
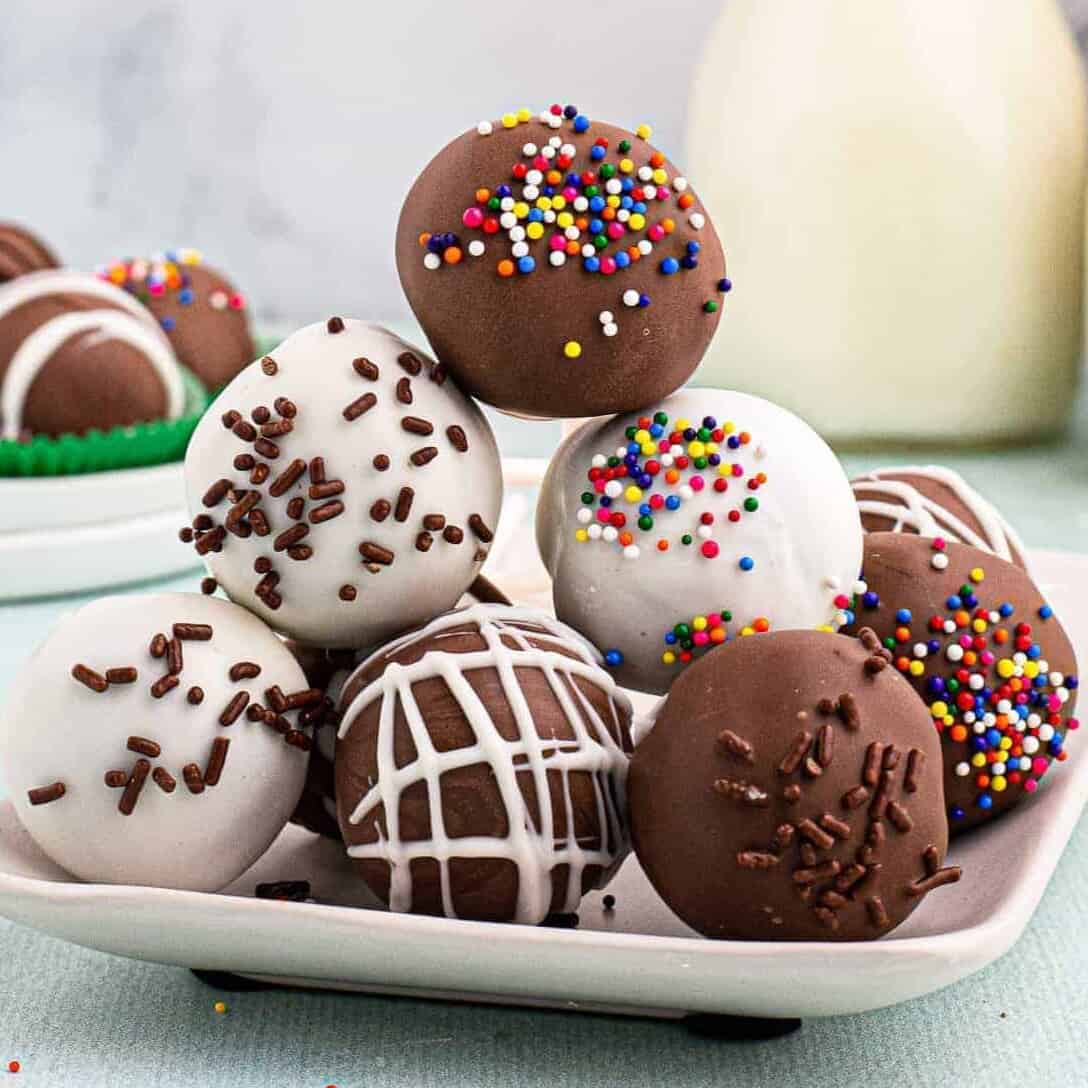
Step 3: While the chocolate coating is still wet, decorate your cake pops with sprinkles, mini chocolate chips, or any other desired toppings. You can also use colored candy melts to drizzle patterns or create unique designs.
Step 4: Place the decorated cake pops back on the parchment-lined baking sheet and allow them to cool and set completely. You can speed up the process by placing them in the refrigerator for about 20 minutes.
Keep Exploring the Delicious World of Chocolate
Variations of Chocolate Cake Pops
While traditional chocolate cake pops are undeniably delicious, there are several variations you can try to add a unique twist to your creations. Here are three delightful variations of chocolate cake pops to experiment with:
White Chocolate Raspberry Cake Pops
If you’re a fan of the sweet and tangy combination of white chocolate and raspberries, these cake pops are a must-try. Replace the regular chocolate coating with melted white chocolate and add a teaspoon of raspberry preserve to the cake mixture before shaping the pops. The result is a burst of fruity goodness in every bite.
Mint Chocolate Chip Cake Pops
If you’re a fan of refreshing mint flavors, these cake pops will be a favorite. Use chocolate cake as the base and mix in a teaspoon of peppermint extract to the cake mixture. Roll the cake pops in crushed chocolate wafer cookies or add a sprinkle of mini chocolate chips before the coating sets. These pops are perfect for any mint-chocolate lover.
Salted Caramel Chocolate Cake Pops
For those who enjoy the combination of sweet and salty flavors, these cake pops will satisfy your cravings. Mix caramel sauce or dulce de leche into the cake crumbs before shaping the pops. Sprinkle a pinch of sea salt on top of the chocolate coating for an extra burst of flavor. The result is a harmonious blend of rich chocolate, caramel, and a hint of saltiness.
With these delicious variations, you can easily customize your chocolate cake pops to suit your taste preferences and surprise your taste buds with new delightful combinations.
Tips for Perfect Chocolate Cake Pops
To ensure your chocolate cake pops turn out beautifully every time, here are a few helpful tips:
- Ensure your cake crumbs are finely ground, as larger chunks may make it difficult for the mixture to hold its shape.
- When shaping the cake pops, make sure the balls are compact and evenly sized to ensure even baking and coating.
- When dipping the cake pops in chocolate, gently swirl them in the coating to ensure a smooth and even coat.
- Use a foam block or styrofoam to hold the cake pops upright while the coating sets.
- Get creative with decorations! Use different types of sprinkles, edible glitter, or miniature fondant shapes to add a touch of whimsy to your cake pops.
- Experiment with flavor combinations by adding extracts, liqueurs, or crushed cookies to the cake mixture.
- Store your finished cake pops in an airtight container in the refrigerator to keep them fresh for up to five days.
So, what are you waiting for? Gather your ingredients, roll up your sleeves, and get ready to create a batch of these incredible chocolate cake pops. They are not only a delight to make but also a pleasure to enjoy. Indulge in these poppable chocolate treats and spread the joy of chocolatey goodness with family and friends!
Key Takeaways: Chocolate Cake Pop Recipe: Poppable Chocolate Delights
- Chocolate cake pops are bite-sized treats that combine the deliciousness of cake and the convenience of being on a stick.
- The recipe is easy to follow and perfect for 13-year-old kids to try out in the kitchen.
- You’ll need basic ingredients like cake mix, frosting, and chocolate, along with some decorative sprinkles.
- Rolling the cake mixture into balls, inserting sticks, and dipping them in melted chocolate is a fun and creative process.
- The end result is a delightful and indulgent dessert that’s perfect for parties, celebrations, or simply satisfying your chocolate cravings.
Frequently Asked Questions
Are you looking for a delectable chocolate treat that’s both delicious and portable? Look no further than chocolate cake pops! These bite-sized delights are made with a rich chocolate cake base and are coated in a decadent chocolate shell. Whether you’re planning a party or just want a sweet treat, chocolate cake pops are the perfect choice!
Q: How do I make chocolate cake pops?
A: Making chocolate cake pops is easier than you might think! First, bake a chocolate cake according to your favorite recipe. Once the cake has cooled, crumble it into fine crumbs in a large bowl. Then, mix in some frosting until the mixture is moist and holds its shape when rolled into a ball. Roll the mixture into small balls and place them in the refrigerator to firm up. Finally, dip each ball into melted chocolate and decorate with sprinkles or other toppings. Let them set, and you have delicious chocolate cake pops!
Q: Can I customize the flavors of my chocolate cake pops?
A: Absolutely! While chocolate cake pops are already incredibly delicious, you can certainly customize their flavors to your liking. Instead of a classic chocolate cake, you can try using other cake flavors like vanilla, red velvet, or even funfetti. You can also experiment with different types of frosting such as cream cheese, peanut butter, or even Nutella. Get creative and have fun with creating unique flavor combinations for your chocolate cake pops!
Q: How do I prevent my cake pops from falling off the stick?
A: One common issue when making cake pops is that they can sometimes fall off the stick. To prevent this, there are a few tricks you can try. First, make sure the cake mixture is well combined and holds its shape when rolled into a ball. If the mixture is too dry, add a little more frosting to moisten it. When inserting the sticks into the cake balls, dip the tip of each stick into melted chocolate before inserting it. This creates a sort of “glue” to hold the cake pop in place. Finally, refrigerate the cake pops for at least 30 minutes or until they are firm before dipping them into melted chocolate. This helps to ensure they stay securely on the stick.
Q: How should I store my chocolate cake pops?
A: To store your chocolate cake pops, it’s best to keep them in an airtight container in the refrigerator. This helps to maintain their freshness and prevent them from drying out. You can either store them standing upright in the container, using foam or a block of styrofoam to hold them in place, or you can wrap each cake pop individually in plastic wrap before placing them in the container. When it’s time to enjoy them, simply take them out of the refrigerator and let them come to room temperature for a few minutes before diving in!
Q: Can I make chocolate cake pops in advance?
A: Absolutely! Chocolate cake pops are a great make-ahead treat. You can prepare the cake pops up to a day or two in advance. Once you’ve made the cake balls, refrigerate them until you’re ready to dip them in chocolate. You can also freeze the cake balls for longer storage. Just place them in an airtight container or freezer bag and freeze for up to a month. When you’re ready to enjoy them, simply thaw them in the refrigerator overnight and proceed with dipping them in chocolate. This makes it convenient to have a stash of delicious chocolate cake pops whenever you’re in the mood for a sweet treat!
Chocolate Cake Balls! Recipe tutorial #Shorts
Summary
Making chocolate cake pops is a fun and tasty activity for kids. Start by baking a chocolate cake, then crumble it up and mix with frosting. Shape the mixture into balls, insert a stick, and let them chill. Dip the cake pops in melted chocolate and decorate with sprinkles. Enjoy!
These homemade treats are perfect for parties and special occasions. Get creative with different flavors, decorations, and toppings. With just a few simple steps, you can create delicious and adorable chocolate cake pops that everyone will love.


